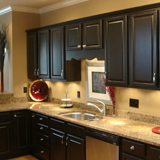
Painting Cabinets
Painting cabinets is not something that is going to cause problems and in fact, it is an inexpensive way of improving the appearance of a bathroom or kitchen cabinet. Often times, the cabinet in your home may be of a color that is outdated or you may want to give it a new look. Regardless, you can experiment with colors that are bold and in this way you can give your cabinets an absolutely fresh and appealing look.
What you need
Before actually starting to paint the cabinets, it is necessary to have all the required material and tools on hand. It is necessary to have the following:
- Some masking tape and a marker
- Screwdriver or a cordless drill
- Putty and a putty knife
- Some primer
- Paint that is oil-based or it could be latex paint
- A tray to hold the paint
- A paint sprayer or a paint roller
- Brushes
- Some cloth
- Hinges and knobs
1. Remove objects and drawers
There are certain steps that have to be completed in order to get satisfactory results from painting your cabinets. The first step involves removal of all objects from your cabinet and its drawers. Next, take some drop cloth and spread it around the working area to prevent paint from dropping on the floor. You will also need to apply the masking tape or painter’s tape to the surface that is not to be painted.
2. Use masking tape/painter’s tape
Take some masking tape or painter’s tape and put it on the interiors of the cabinet door and drawer. On this tape, mark the cabinet door or drawer to let you know where they were removed from. Be sure to apply the tape in a light manner as it has to be moved when applying the prime and paint on either side of the door/drawer.
It is necessary to deal with the fixtures in a certain manner. With the help of a screwdriver or with a reversible drill, take out the doors and the hinges from the cabinet. If you cannot easily remove the drawer fronts, leave them attached. Be sure to remove all hinges and knobs as well as pulls from the doors and drawers of the cabinet.
3. Clean and sand
Once this step has been successfully completed, it is time to start the cleaning and/or sanding of the cabinets. Be sure to clean the cabinet base, doors and drawers with some mild soapy water or with a household cleaning liquid. Wipe these clean after rinsing them. If there are nicks on the base or on the drawers or on the doors, then apply some putty with a putty knife to repair the damage.
The outside of the cabinet needs to be sanded over lightly and the same has to be done to the doors and the front of the drawers. To sand, you should make use of a medium or a fine-grit sandpaper. After that, wipe the surfaces clean with a damp cloth.
4. Paint the first coat
Paint the first coat with the help of a sprayer or roller or even with a brush. Prime the cabinet doors on each side. You can then paint the cabinet with either latex paint or with oil-based paint. Once this is done, apply a second coat and then allow the paint to dry and once the paint has dried you can reattach all the items that you had detached and your cabinet will be ready.

